1. Generate a key file using SN.exe utility which is provided with .NET framework.
sn -k myKeyFile.snk
 Here, myKeyFile.snk is the name of the key and it stores under c:\GACDemo directory.
2. Now make a copy of the third party dll that you want to sign.
Here, I'm using OauthLibrary.dll

3. Now dis-assemble the assembly
ildasm OauthLibrary.dll /out:OauthLibrary.il

4. Output after the dis-assemble the above assembly --> following files were created under my directory.

5. Now rename the assembly (In my case I used OAuthLibrary.dll.orig, You can give a name as per your preference).
ren OauthLibrary.dll OauthLibrary.dll.orig
 Now the dll has renamed into OAuthLibrary.dll.orig as follows
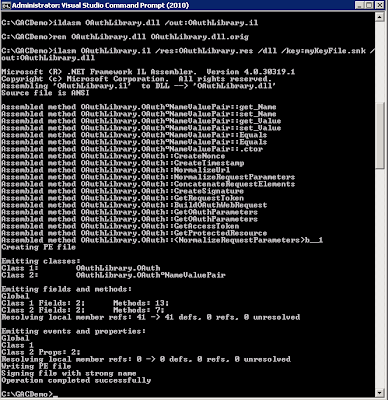
6. Now re-assemble the particular dll with the generated strong name key
ilasm OauthLibrary.il /res:OauthLibrary.res /dll /key:myKeyFile.snk /out:OauthLibrary.dll
 Output after running the above command,
 Now the signed dll has been copied into the working directory as follows, (Check your working directory, in my case its, C:\GACDemo\)
7. Verify your signed dll using the following command.
sn -vf OauthLibrary.dll

8. Above verified dll is allowed to add into GAC using “gacutil -i” or drop it to C:\Windows\assembly folder by dragging it.
No comments:
Post a Comment